
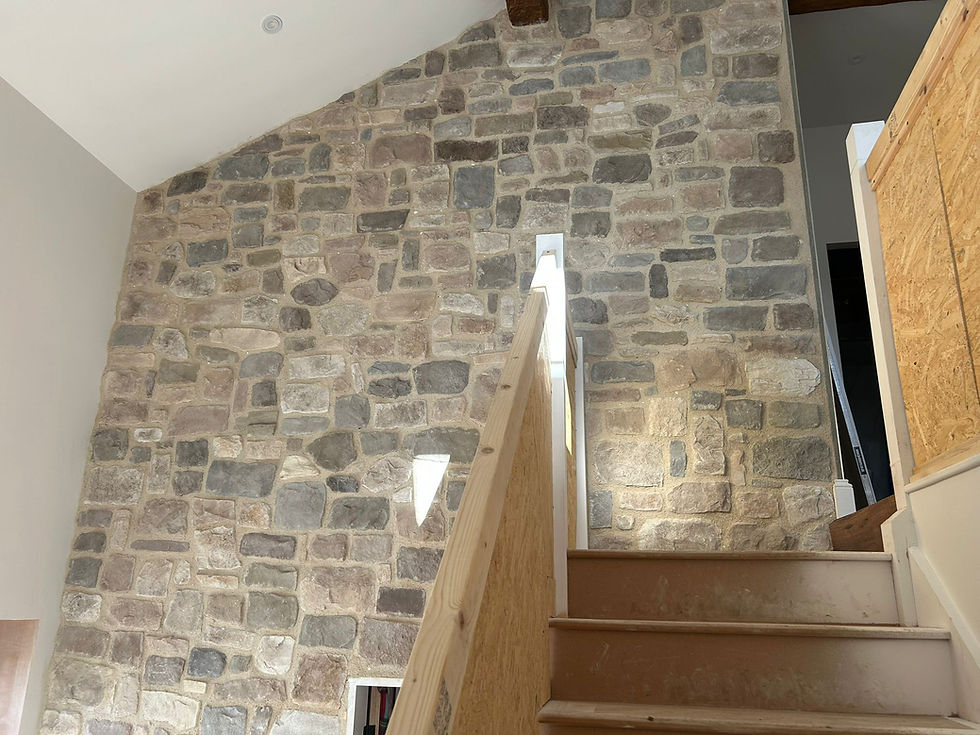
DIY Cladding: A Practical Guide for Confident Home Improvers
- Theo Bagnall
- Feb 16
- 2 min read


Taking on a DIY cladding project can transform a small area of your home or garden, adding style and protection without the cost of hiring professionals.
This guide walks you through each step, helping you gain confidence and avoid common pitfalls.
Before You Start
DIY cladding suits small-scale projects such as:
Feature walls inside or outside your home
Garden walls or outdoor kitchen areas
Low-height applications that don’t require scaffolding
Avoid multi-storey walls, structural elements, or any work needing formal approvals without checking local building regulations. Safety and durability depend on proper installation, so know your limits.
Step 1: Prepare the Surface
A solid foundation is key. Your wall should be:
Sound and stable
Clean, dry, and free of dust, grease, or loose material
Flat and smooth for even adhesion
For external walls, waterproofing or a fully cured render may be necessary. Use a primer if recommended by your adhesive manufacturer. ZClad Adhesive does not need a primer, unless the wall is retaining soil or directly backing into earth. Skipping this step risks poor bonding and future damage.
Step 2: Dry Lay First
Before mixing any adhesive, lay out your cladding pieces on the floor. This lets you:
Mix pieces from different boxes/pallets to blend colours naturally
Adjust spacing and plan cuts
Check corners and edges for a neat finish
Avoid repeating patterns
Taking time here prevents surprises once you start fixing the cladding to the wall.
Step 3: Mix Adhesive Properly
Follow these tips for the best adhesive mix:
Add water first, then powder
Stir to a thick, workable consistency, similar to smooth peanut butter
Let the mix rest for a few minutes, then remix
Only prepare enough adhesive you can use within its working time
Proper mixing ensures strong bonding and easier application.

Step 4: Apply Adhesive Generously
This step is critical for a lasting finish:
Use a notched trowel to spread adhesive fully on the wall—avoid spot fixing
Slather the back of each cladding piece thoroughly
Ensure no gaps remain to prevent air pockets and moisture issues
Full coverage creates a strong, weather-resistant bond.
Step 5: Fixing the Cladding
Press each piece firmly into place and wiggle slightly to ensure full contact. Use a level regularly to keep your work straight. Work in small sections, starting from the bottom and building upwards. This approach helps maintain alignment and prevents slippage.
Step 6: Corners and Cuts
Corners require special attention:
Use pre-made corner pieces where possible for a clean finish
Measure twice before cutting to avoid mistakes
Wear personal protective equipment (PPE) such as gloves and safety glasses when cutting
Taking care with corners improves the overall look and durability of your cladding.
Step 7: Grouting and Curing
If your cladding requires grouting, wait until the adhesive has fully set. Clean any excess grout immediately to avoid staining. Protect your work from rain, frost, or extreme heat during curing to ensure the best results.


Comments